Camera-Based LED Segment Set-up
The Earliest Vision
Months ago, I had the idea for my app to use ARKit, Apple's augmented reality framework, to extract the 3D mapping of a user's LED strip setup simply. I wrote about it here.
The GIF below shows the setup I had before. It was only ever in the early prototype stage, as visible by the flashing images and slow, ~5 FPS performance. The goal was to extract points from ARKit hit test results at LED positions to build a nice visual representation of the setup in 3D space.
The Updated Revision
Quickly, the scope of the ARKit project became too much for me to handle at the time, but the experience I have gained over the last few months of development had me revisiting the project.
I had developed some new skills over the months, and my strategies for the new, more elegant system included:
- Native Swift Plugin: Thanks to my audio signal processing project, I became much more comfortable writing plugins for Flutter in native Swift. Now, performance could be increased to the native refresh rate, which for modern phones is 120 Hz. Also, I would have access to Apple's built-in Accelerate framework, allowing me to leverage processing techniques Apple had designed the phones to be good at.
- Reduced Scope: While it may seem like a step backward, one of the major lessons I've learned is to reduce the scope of a project, and to build up from there. The elegance of my projects has greatly increased by focusing more effort on a specific feature, rather than spreading myself thin. I reduced the scope from the ambitious ARKit 3D scan, to a simple feedback-based system using the camera. In the future I absolutely plan on getting back to the automatic 3D scan, I've got many ideas I'd like to try out.
- UDP Streaming: Just as with the audio signal processing project, low latency was key. I used the same UDP streaming protocol from that project, just to lower the latency even more. In connection with the native swift plugin for camera interaction, even my prototype version without other optimizations feels buttery smooth.
- A Clear Idea: Another lesson I've learned in elegant development- I wrote down the goal and main concepts completely in my notebook before writing any code. This allowed me to lock in when it came time to programming, and reference the notebook for the goal I was working towards.
Working Prototype
Much of what I'm sharing here is being actively worked on. The reason I've withheld writing about specific implementation details is because these systems are still subject to change.
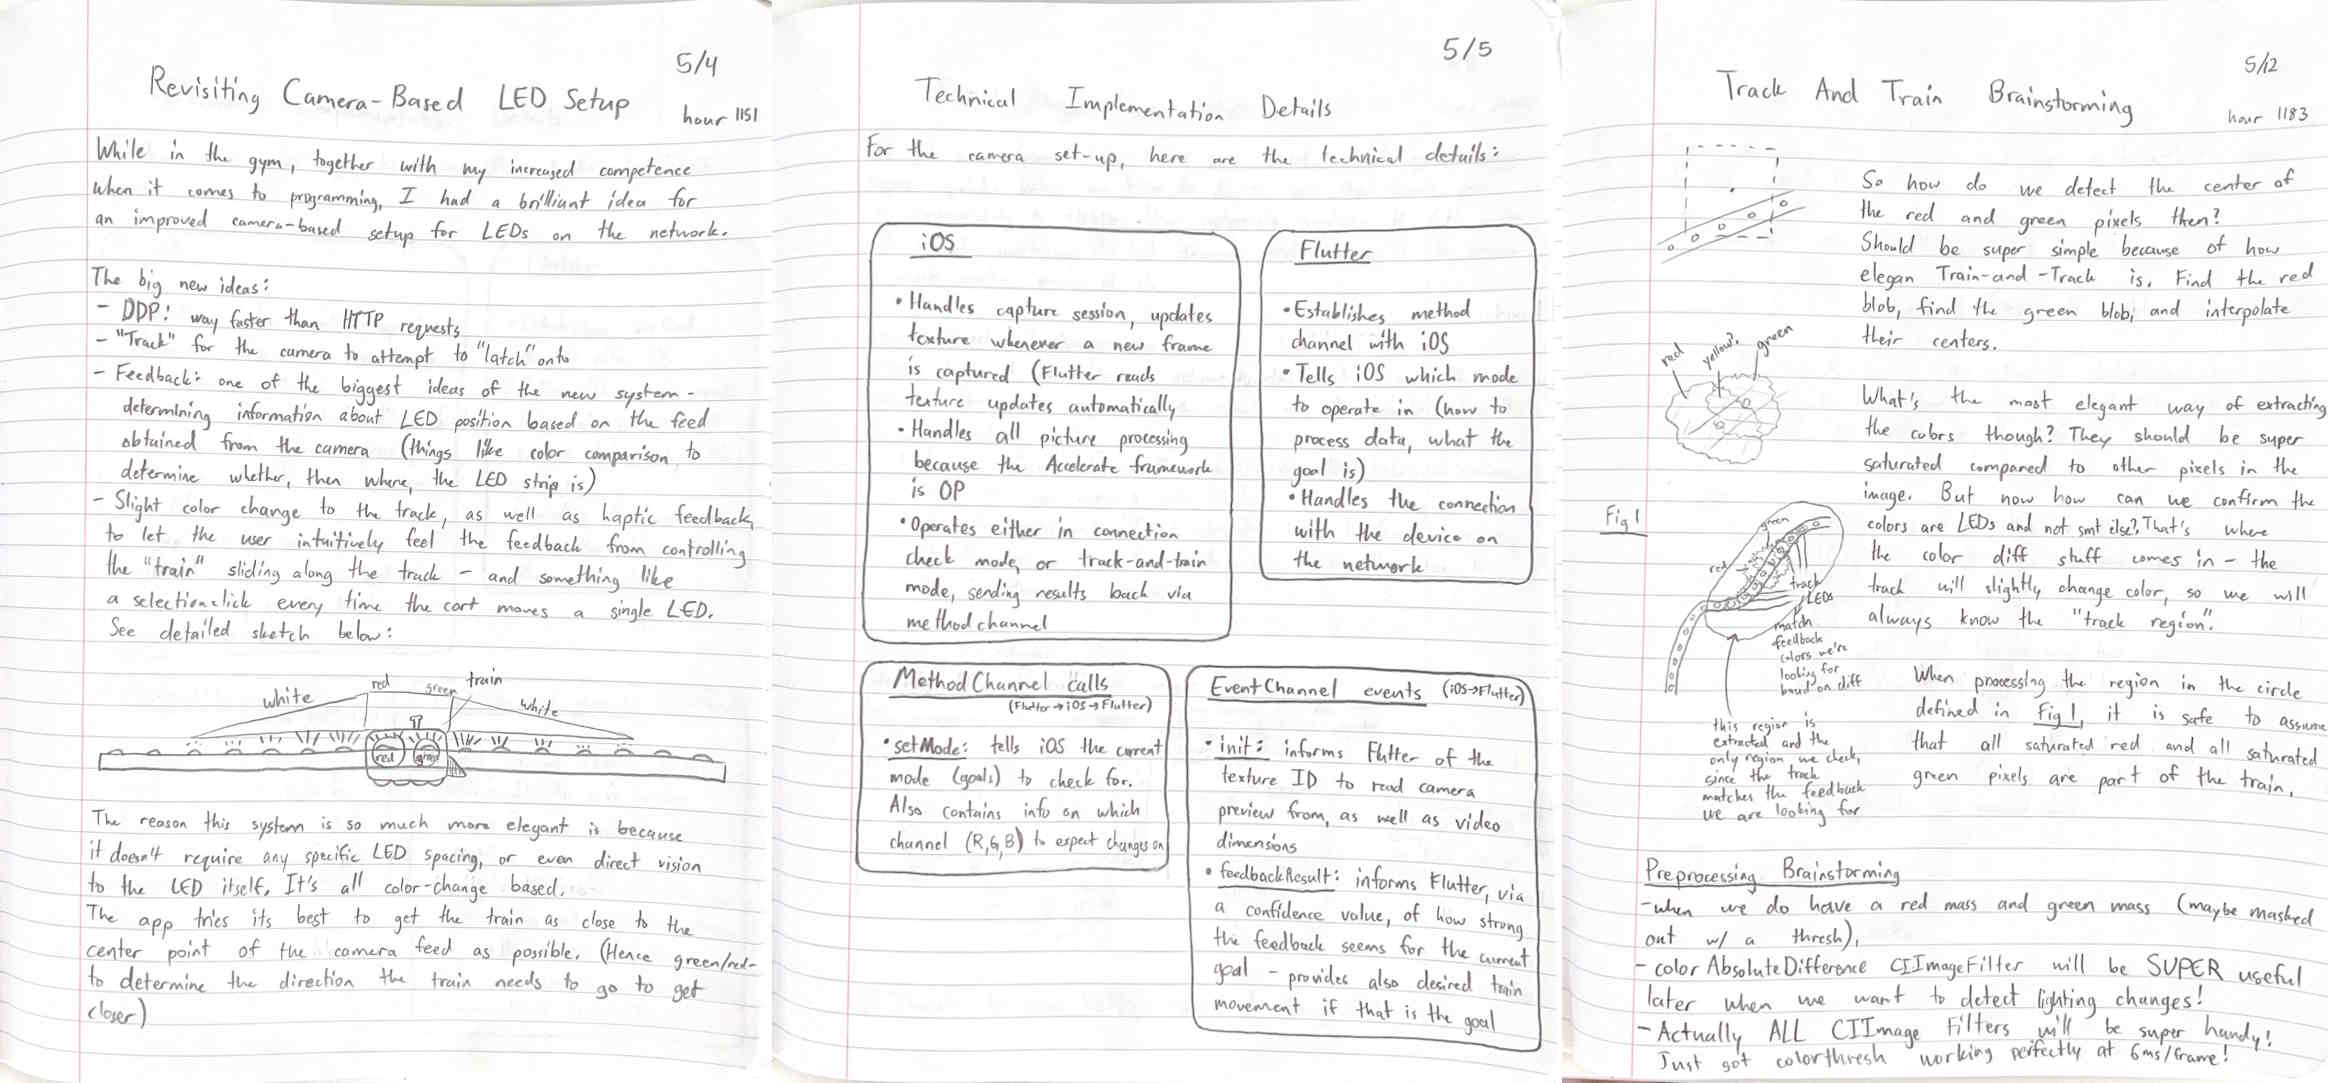
Here is the first working prototype. We extract strong red and strong green pixels, find the center of both of their contours, then do some linear algebra vector projection magic to determine how many pixels to move in order to get the index of the LED strip to most closely match the center of the camera capture.
Stay on the lookout- I will be updating this page (and my portfolio in general) as more progress is made.